
前言
平时公司做项目积累了一些自己封装的类,每次新建项目总要拖进去总感觉很low,所以决定弄个pod私人库,顺便了解一下组件化开发,以下仅是记录下创建和使用过程和遇到的问题。
过程
创建两个仓库
首先要在代码托管平台(CODING,码云,github,BitBucket等)创建两个仓库,一个是放Spec Repo的,一个放你的代码库。
我使用的是码云,命名根据个人习惯,看的懂就好:

创建私有Spec Repo
什么Spec Repo呢?
Spec Repo是所有的Pods的一个索引,就是一个容器,所有公开的Pods都在这个里面,它实际是一个Git仓库remote端在GitHub上,但是当你使用了Cocoapods后它会被clone到本地的~/.cocoapods/repos目录下,可以进入到这个目录看到master文件夹就是这个官方的Spec Repo了。
怎么创建呢?
到Terminal执行:
1
2
# pod repo add [Private Repo Name] [GitHub HTTPS clone URL]
$ pod repo add JNUIKitComponentSpec https://gitee.com/jacknehc/JNUIKitComponentSpec.git执行完到~/.cocoapods/repos目录,看到JNUIKitComponentSpec就是成功了。
创建Pod项目工程文件
可以使用Cocoapods提供的一个工具直接创建代码库,cd到自己存放代码地方执行:
1
pod lib create JNUIKitComponent
创建成功会出现如下:
1
2
3
4
5
6
7
8
9
10
11
12
13
14
15
16
17
18
19
20
21
22
23
24
25
26
27
28
29
30
31
32
33
34
35
36
37
38
39
40
41
42
43
44
45
46
47
48
49
50
51
Cloning `https://github.com/CocoaPods/pod-template.git` into `JNUIKitComponent`.
Configuring JNUIKitComponent template.
------------------------------
To get you started we need to ask a few questions, this should only take a minute.
If this is your first time we recommend running through with the guide:
- https://guides.cocoapods.org/making/using-pod-lib-create.html
( hold cmd and click links to open in a browser. )
What platform do you want to use?? [ iOS / macOS ]
> iOS
What language do you want to use?? [ Swift / ObjC ]
> ObjC
Would you like to include a demo application with your library? [ Yes / No ]
> Yes
Which testing frameworks will you use? [ Specta / Kiwi / None ]
> None
Would you like to do view based testing? [ Yes / No ]
> No
What is your class prefix?
> JN
Running pod install on your new library.
Analyzing dependencies
Fetching podspec for `JNUIKitComponent` from `../`
Downloading dependencies
Installing JNUIKitComponent (0.1.0)
Generating Pods project
Integrating client project
[!] Please close any current Xcode sessions and use `JNUIKitComponent.xcworkspace` for this project from now on.
Sending stats
Pod installation complete! There is 1 dependency from the Podfile and 1 total pod installed.
[!] Automatically assigning platform ios with version 9.3 on target JNUIKitComponent_Example because no platform was specified. Please specify a platform for this target in your Podfile. See `https://guides.cocoapods.org/syntax/podfile.html#platform`.
Ace! you're ready to go!
We will start you off by opening your project in Xcode
open 'JNUIKitComponent/Example/JNUIKitComponent.xcworkspace'
To learn more about the template see `https://github.com/CocoaPods/pod-template.git`.
To learn more about creating a new pod, see `http://guides.cocoapods.org/making/making-a-cocoapod`.他会询问几个问题,根据实际使用情况自己选择就好。
存放代码
把你自己的代码放到刚建的Pod项目文件工程的这个目录下:
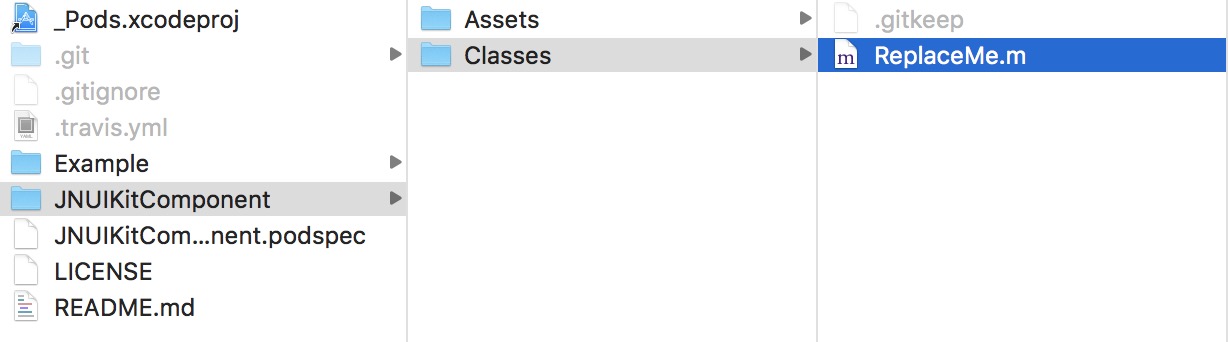
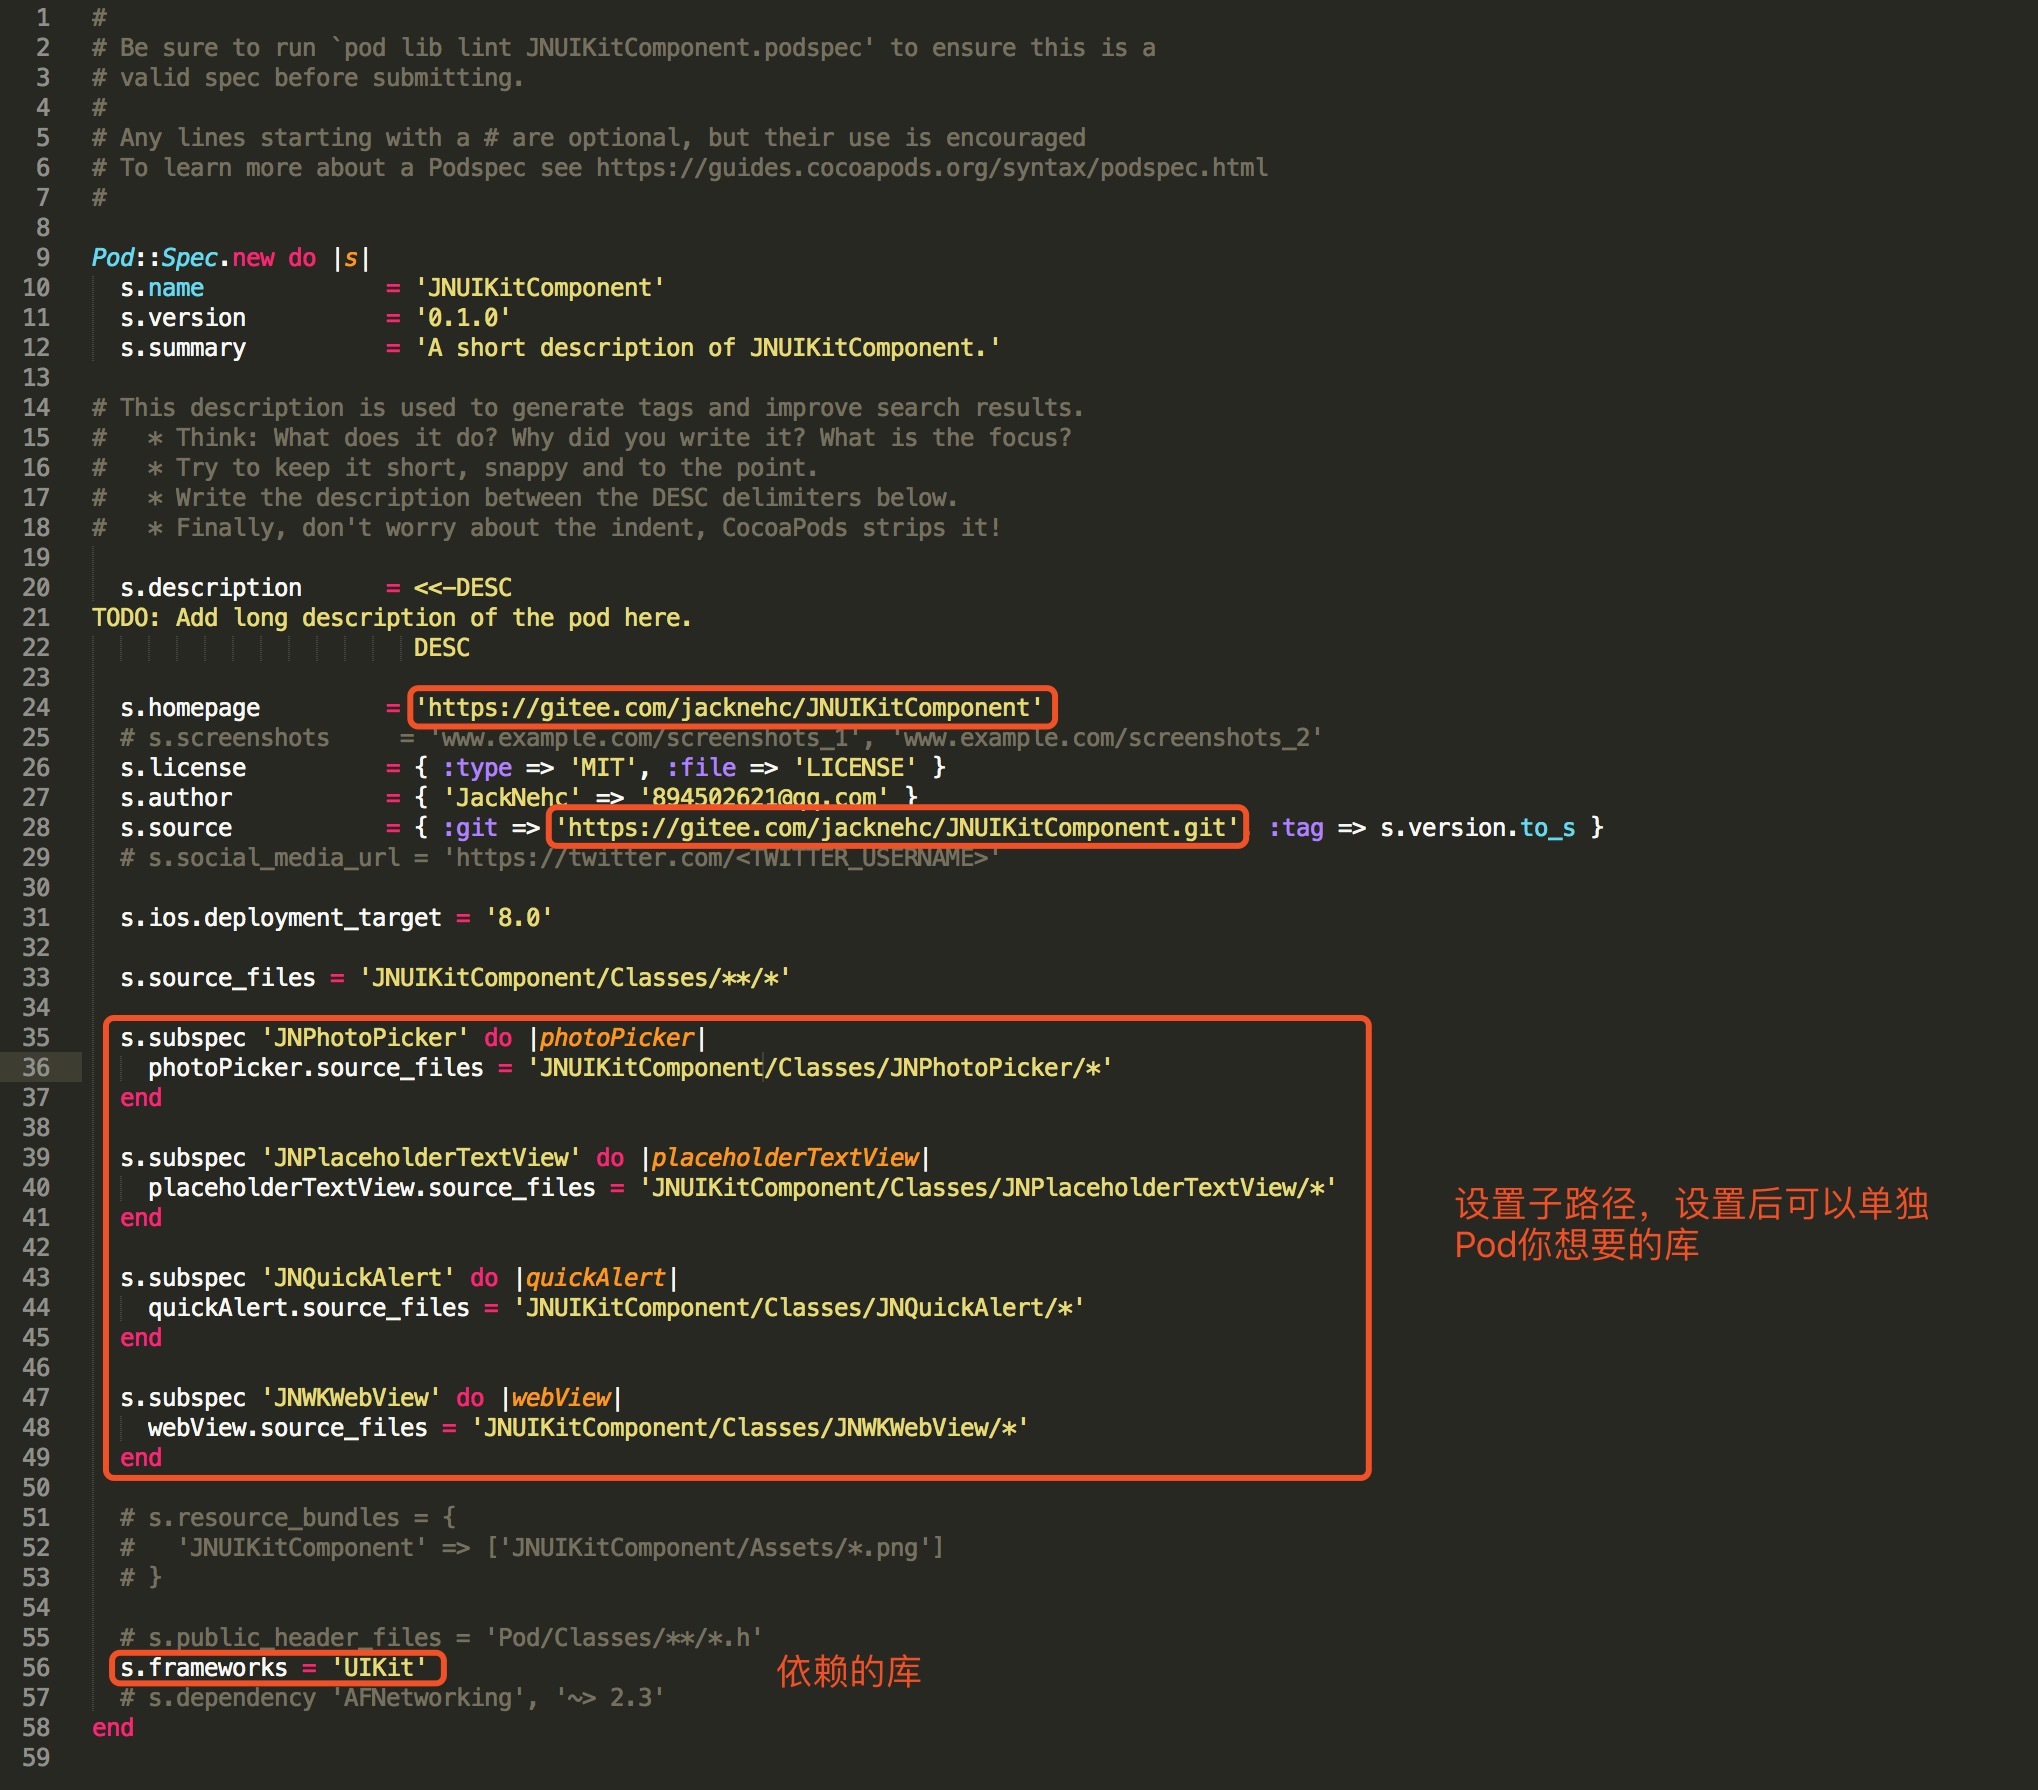
修改.podspec文件
修改Pod项目文件工程根目录下的.podspec文件,一般改这几个参数:
修改后要验证下,cd到.podspec文件目录下,执行:
1
pod lib lint --allow-warnings
因为会有警告,所以我一般都加上–allow-warnings
提交代码到代码仓库
可能git使用的不熟,遇到点小问题,首先cd到Pod项目文件工程目录下,执行以下提交代码:
1
2
3
4
5
$ git add .
$ git commit -s -m "Initial Commit of Library"
# 添加远端仓库
$ git remote add origin git@gitee.com:jacknehc/JNUIKitComponent.gitgit@gitee.com:jacknehc/JNUIKitComponent.git是你存放的代码寄放平台获取的ssh地址,通过ssh协议来拉取代码,所以你需要在本地生成公钥私钥:
1
2
# -C后面填写你的邮箱
ssh-keygen -t rsa -C 'xxx@xxx.com'然后到~/.ssh/查看id_rsa.pub,复制里面的内容到代码寄放平台的公钥里就可以了,然后接下来提交代码:
1
2
# 提交到远端仓库
$ git push origin master这时候报错提示:
1
2
3
4
5
6
7
8
To gitee.com:jacknehc/JNUIKitComponent.git
! [rejected] master -> master (fetch first)
error: failed to push some refs to 'git@gitee.com:jacknehc/JNUIKitComponent.git'
hint: Updates were rejected because the remote contains work that you do
hint: not have locally. This is usually caused by another repository pushing
hint: to the same ref. You may want to first integrate the remote changes
hint: (e.g., 'git pull ...') before pushing again.
hint: See the 'Note about fast-forwards' in 'git push --help' for details.这是要你先pull更新下远程的内容
1
git pull origin master --allow-unrelated-histories
不加
--allow-unrelated-histories会报1
fatal: refusing to merge unrelated histories
的错,执行完后又有错:
1
2
3
4
5
6
7
From gitee.com:jacknehc/JNUIKitComponent
* branch master -> FETCH_HEAD
Auto-merging README.md
CONFLICT (add/add): Merge conflict in README.md
Auto-merging .gitignore
CONFLICT (add/add): Merge conflict in .gitignore
Automatic merge failed; fix conflicts and then commit the result.执行:
1
git status
提示:
1
2
3
4
5
6
7
8
9
10
11
12
On branch master
You have unmerged paths.
(fix conflicts and run "git commit")
(use "git merge --abort" to abort the merge)
Unmerged paths:
(use "git add <file>..." to mark resolution)
both added: .gitignore
both added: README.md
no changes added to commit (use "git add" and/or "git commit -a")所以我执行了以下三句命令:
1
2
3
git add .gitignore
git add README.md
git commit然后在push:
1
git push origin master
终于成功了/(ㄒoㄒ)/~~,然后接下来一步是重点,要到你代码寄存平台打tag,或者终端git命令也行,这个tag要跟第5步修改的.podspec文件的
s.version参数所写的标签一样,以后更新也是如此,代码仓库的tag要和.podspec文件的版本对的上。向Spec Repo提交.podspec
当然要cd到你的.podspec目录下,
执行以下命令:1
2
3# 前面是本地Repo名字 后面是podspec名字
$ pod repo push JNUIKitComponentSpec JNUIKitComponent.podspec成功后会出现:
1
2
3
4
5
6
7
8
9
10
11
12
13
14
15
16
17
18
19
20
21
22
23
24Counting objects: 99, done.
Delta compression using up to 8 threads.
Compressing objects: 100% (90/90), done.
Writing objects: 100% (99/99), 37.02 KiB | 0 bytes/s, done.
Total 99 (delta 25), reused 0 (delta 0)
remote: Powered by Gitee.com
To gitee.com:jacknehc/JNUIKitComponent.git
b5560cf..858258c master -> master
jacknehc ~/Documents/My/MyPods/Private/JNUIKitComponent master pod repo push JNUIKitComponentSpec JNUIKitComponent.podspec --allow-warnings
Validating spec
-> JNUIKitComponent (0.1.0)
- WARN | summary: The summary is not meaningful.
- WARN | url: The URL (https://gitee.com/jacknehc/JNUIKitComponent) is not reachable.
Updating the `JNUIKitComponentSpec' repo
Already up-to-date.
Adding the spec to the `JNUIKitComponentSpec' repo
- [Add] JNUIKitComponent (0.1.0)
Pushing the `JNUIKitComponentSpec' repo
使用
至此,私人库就制作完成了,使用的时候profile要这样填写:
1
2
3
4
5
6
7
8
9
10
11
12
# 下面这一句不能省,不然pod不到公共的库
source 'https://github.com/CocoaPods/Specs.git'
source 'https://gitee.com/jacknehc/JNUIKitComponentSpec.git'
platform :ios, '8.0'
target 'Test' do
pod 'JNUIKitComponent/JNPhotoPicker', '~> 0.1.0'
pod 'JNUIKitComponent/JNPlaceholderTextView', '~> 0.1.0'
end